How to Change Display DPI (Android)
Make the icons, text, and other items smaller and larger on your Android device by changing the display DPI (dots per inch) with these steps.
Option 1 – Android 7 (Nougat) and Higher
I, Open “Settings” > “Display” > “Display size“.
II, Use the slider to choose the setting you like.
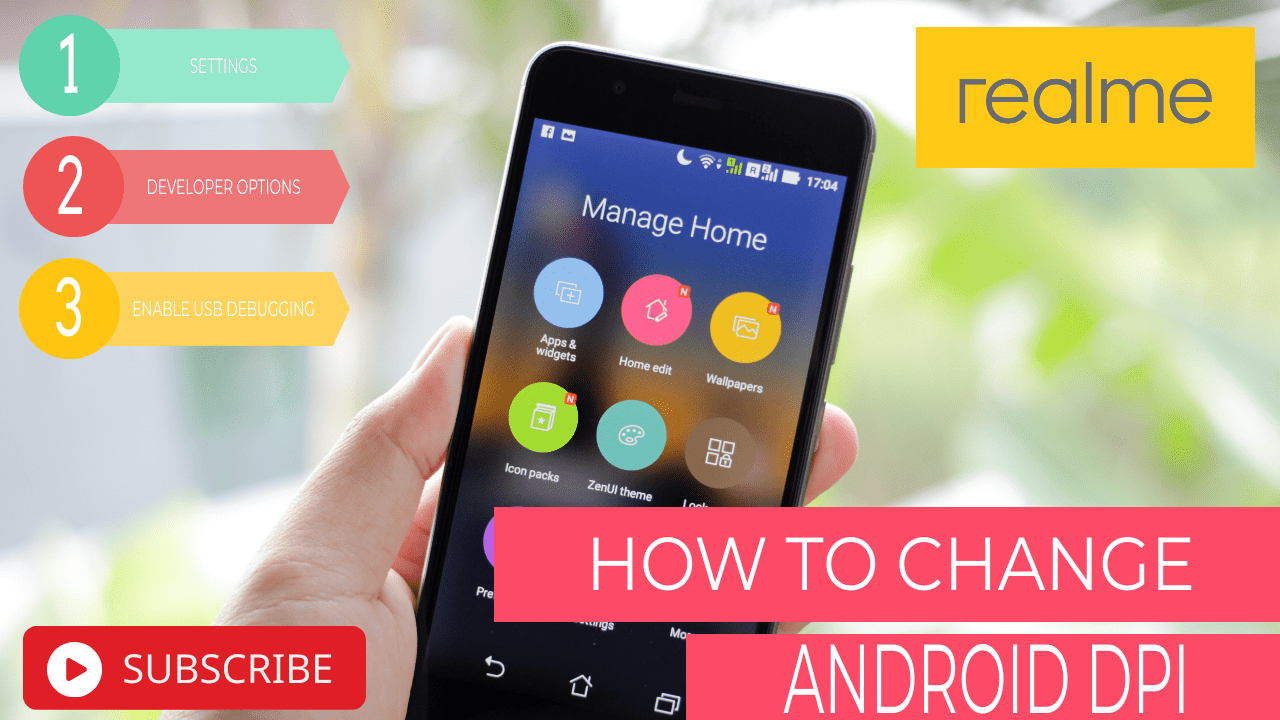
Option 2 – All Android Versions
1, On your Android device, go to “Settings” > “About Phone“.
2, Tap “Build number” 7 ties until it says “Congratulations, you are a developer!”
3, Now under “Settings” you will have a “Developer Options” selection. Tap it.
4, Turn on “Enable USB debugging“.
5, Download and extract the Android Platform Tools to a location on your computer.
6, Windows users, download and install the Google USB Driver or the OEM USB Driver depending on your device.
7, From a command prompt, navigate to the folder where ADB is located.
8, Connect your Android to your PC. Check the Android for a prompt to “Allow USB debugging“. If display, select “OK“.
9, Type “adb devices“, then press “Enter“. This should give you a list of devices connected and will verify everything is set up fine. If your device doesn’t show up, try to troubleshoot an issue with your computer detecting it.
10, Perform one of the following actions:
A, Non-rooted users, type the following, but replace “DPI” with the value you would like to use, then press “Enter“:
adb shell wm density DPI && adb reboot
B, Rooted users, need to type “su“, then press “Enter“. From there, enter the following command, replacing “DPI” with the value you would like to use, then press “Enter“:
wm density DPI && reboot