

Freecharge is a digital wallet and online payment platform based in India. It allows users to make payments for a variety of services such as mobile recharges, utility bill payments, and online shopping. The platform also offers a payment gateway service that enables merchants to accept payments online through various methods including credit/debit cards, net banking, and the Freecharge wallet itself.
Key features of Freecharge Payment Gateway include:
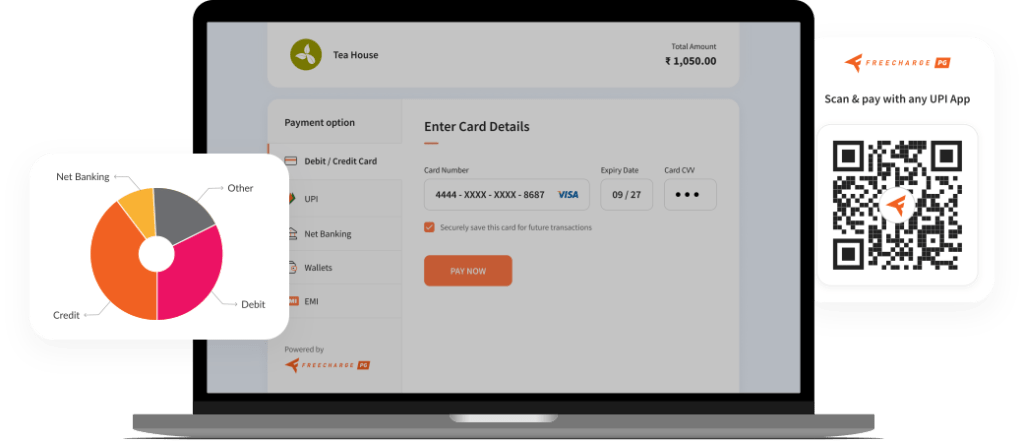
- Multiple Payment Options: Supports payments through credit/debit cards, net banking, UPI, and digital wallets.
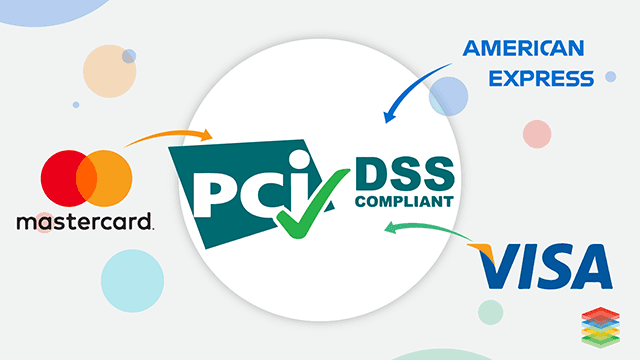
- Security: Employs robust security measures to ensure safe transactions, including PCI-DSS compliance.
- Seamless Integration: Provides easy integration options for merchants through APIs and SDKs.
- Quick Settlements: Facilitates fast settlement of funds to merchants’ accounts.
- User-Friendly Interface: Offers an intuitive interface for both merchants and customers.
Contents
- 1 Quick Onboarding payment gateway
- 2 Payment Options
- 3 How to register a payment gateway?
- 3.1 1. Research and Choose a Payment Gateway
- 3.2 2. Sign Up
- 3.3 3. Provide Business Information
- 3.4 4. Provide Personal Information
- 3.5 5. Verify Business Details
- 3.6 6. Set Up Bank Account
- 3.7 7. Integrate the Payment Gateway
- 3.8 8. Test the Integration
- 3.9 9. Go Live
- 3.10 10. Monitor Transactions
- 3.11 Example: Registering for Stripe
Quick Onboarding payment gateway
Quick onboarding for a payment gateway generally refers to a streamlined and efficient process for businesses to start accepting online payments with minimal delay. This process is designed to be fast and user-friendly, allowing merchants to set up and integrate the payment gateway into their websites or applications quickly.
Key aspects of quick onboarding for a payment gateway typically include:
- Simple Sign-Up Process: Easy and straightforward registration with minimal documentation requirements.
- Instant Activation: Immediate or very quick activation of the merchant account once basic information is verified.
- Easy Integration: Provision of plugins, APIs, and SDKs that can be easily integrated into various platforms (e.g., e-commerce websites, mobile apps).
- User-Friendly Dashboard: An intuitive dashboard for managing transactions, viewing analytics, and handling refunds.
- Dedicated Support: Access to customer support for assistance during the onboarding process and beyond.
Several payment gateways are known for their quick onboarding processes, including:
- Freecharge: Known for its developer-friendly APIs and comprehensive documentation, making integration straightforward.
- Payu: Offers a quick setup for merchants and is widely recognized and trusted by customers.
- Paytm: Provides easy sign-up and integration, especially popular with small businesses.
- Razorpay: An Indian payment gateway that offers a fast onboarding process with a range of payment options and easy integration.
If you are looking for specific information or guidance on choosing a payment gateway with a quick onboarding process, please let me know!
Payment Options
A payment gateway facilitates transactions by providing various payment options to customers. Here are the common payment options that a robust payment gateway typically supports:
- Credit Cards and Debit Cards: Acceptance of major credit cards (Visa, MasterCard, American Express, etc.) and debit cards.
- Net Banking: Integration with multiple banks to allow direct transfers from a customer’s bank account.
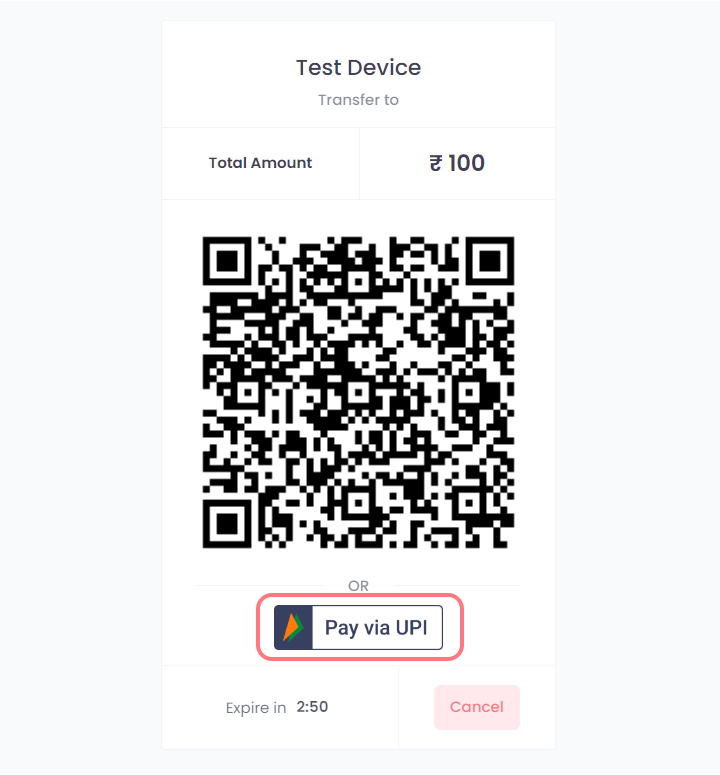
- UPI (Unified Payments Interface): Popular in countries like India, allowing instant bank transfers using a UPI ID.
- Digital Wallets: Support for various digital wallets such as PayPal, Google Pay, Apple Pay, and regional wallets like Paytm, Freecharge, and PhonePe.
- Buy Now, Pay Later (BNPL): Options like Klarna, Afterpay, and Affirm that allow customers to pay in installments.
- EMI (Equated Monthly Installments): Allowing customers to convert their purchases into monthly installments using their credit cards.
- Prepaid Cards: Acceptance of prepaid cards and gift cards.
- Cash on Delivery (COD): While not a digital payment, some gateways offer integration with logistics services to support COD.
- Bank Transfers and eChecks: Direct bank transfers and electronic checks.
- Cryptocurrency: Increasingly, some gateways are accepting Bitcoin and other cryptocurrencies.
- QR Code Payments: For mobile payments where customers scan a QR code to complete a transaction.
When selecting a payment gateway, consider the following:
- Geographic Coverage: Ensure the gateway supports the payment methods popular in your target regions.
- Security: Look for PCI-DSS compliance and robust fraud detection mechanisms.
- Fees: Compare transaction fees, setup fees, and any other costs involved.
- Integration: Check for ease of integration with your existing systems, including plugins for platforms like Shopify, WooCommerce, etc.
- Customer Support: Availability of support to assist with any issues during transactions.
Would you like to know more about any specific payment option or need recommendations for a particular type of business?
How to register a payment gateway?
Registering for a payment gateway typically involves a few key steps. Here’s a general outline of the process:
1. Research and Choose a Payment Gateway
- Evaluate different payment gateways based on your business needs, including transaction fees, supported payment methods, integration ease, security features, and customer support.
2. Sign Up
- Visit the website of the chosen payment gateway.
- Find and click on the “Sign Up” or “Register” button.
3. Provide Business Information
- Fill out the registration form with your business details. This usually includes:
- Business name
- Contact information
- Business address
- Business type and industry
- Tax ID or business registration number
4. Provide Personal Information
- You might need to provide information about the business owner or key personnel, such as:
- Full name
- Date of birth
- Social security number or equivalent
- Contact information
5. Verify Business Details
- Submit documents for verification. These may include:
- Business registration documents
- Tax ID proof
- Bank account details for settlements
- Address proof
- Personal identification documents (e.g., passport, driver’s license)
6. Set Up Bank Account
- Provide your bank account details where you want the funds to be settled.
7. Integrate the Payment Gateway
- Follow the integration instructions provided by the payment gateway. This usually involves:
- API keys for developers to integrate the gateway with your website or app.
- Plugins or extensions for popular e-commerce platforms like Shopify, WooCommerce, Magento, etc.
8. Test the Integration
- Use the test mode to ensure that the payment gateway is correctly integrated and functioning properly.
- Perform test transactions to confirm that payments are processed correctly.
9. Go Live
- Once everything is set up and tested, switch from test mode to live mode.
- Start accepting payments from your customers.
10. Monitor Transactions
- Use the payment gateway’s dashboard to monitor transactions, manage refunds, and view analytics.
Example: Registering for Stripe
- Go to FreechargePG’s Website: Visit Freechargepg.
- Sign Up: Click on “Start Now” or “Get Started.”
- Enter Email: Provide your email address and create a password.
- Business Details: Fill out the form with your business and personal information.
- Verification: Submit necessary documents for verification.
- Bank Account: Enter your bank account details for payouts.
- Integration: Get your API keys and integrate Stripe with your website or app.
- Testing: Use Stripe’s test mode to run test transactions.
- Go Live: Switch to live mode and start processing real transactions.
Each payment gateway may have slight variations in the process, so it’s essential to follow the specific instructions provided by the payment gateway you choose.
Related post:
- TOP 10 BEST PAYMENT GATEWAY IN INDIA (2020)
- PhonePe Payment Gateway
- PayKun – Best Payment Gateway For India 2021
- UPIGateway
Credit Card:
- Kotak upi rupay credit card apply online
- HDFC Bank UPI RuPay Credit Card
- IDFC FIRST Power Rupay Credit Card
- PCI DSS
Banking:
- Register to IndusNet Online Banking
- BOB Kiosk Banking, BOB CSP, BC Commission chart 2024-25
- Documents Required for Opening a Current Account Online
- csc digipay lite commission 2023-2024
- DigiPay v7.3
- Airtel Payment Bank CSP
- SBI CSP Commission Structure
- SBI CSP – How to register sbi csp
- Fino CSP Lite Login
- Fino Payment Bank CSP Login
- how to apply fino payment bank csp
- Fino Payment Bank Commission 2023-2024
- Instant PIN Generation for Debit Card
- BOB CSP Browser Settings
- 7 Points on UPI Payments
- 5 Best Refer and Earn UPI Apps: Earn Free Cash Online
Other’s:
- Beyond the Beast: Jay Leno Tames the F-150 Raptor R and Unveils Its True Power
- Clash of Titans: Warriors vs. Nuggets – The Ultimate NBA Showdown Unveiled!
- United States one-dollar bill
- South Texas College – Pecan Campus
- How to disable right-clicking on a website using JavaScript?
- Unlocking Craig Brown’s Secrets to Success: The Ultimate Guide
- Unsolved Mystery: The Fate of the Five Men Aboard the Missing Titanic Tourist Submersible
- The NCAA Women’s Basketball Champion
- Dodgers
- Indian Premier League 2024
- Real-Time Billionaires
- Bernard Arnault & family
- Los Angeles Lakers
Following my social platform
| Web | www.mytechtrips.com |
| Join telegram channel | Click here |
| Join WhatsApp group | Click here |
| Click here | |
| Click here | |
| Youtube Channel 1 | Click here |
| Youtube Channel 2 | Click here |